
Ventoy LiveCD Instructions
- 1. Background
Ventoy will write data to the USB drive during installation and upgrade, it directly write to the physical sector, and also modifies the MBR and partition table.
In Windows, there are many restrictions for these very low-level operations and this process is easily affected by other programs, such as anti-virus software, active system protection, etc.
Therefore, the installation program of the Windows version often fails to install and upgrade in some systems.
Of course, Ventoy2Disk.exe has been optimized and improved, but there are still more special cases.
Relatively speaking, the installation program of the Linux system directly uses the dd command provided by the system to write data, and there is almost no failure.
But users who use Windows systems generally do not have a Linux environment, so I provide a Ventoy LiveCD as plan B for Windows users.
That is to say, Ventoy LiveCD is not the ISO version of Ventoy, it is just used to install Ventoy.
- 2. LiveCD User
1. Ventoy LiveCD is only for Windows users, and only needed when Ventoy2Disk.exe always fail.
2. Linux users can directly use linux version of Ventoy, and no need to use this LiveCD.
3. If you don't want to use USB drive, you can also test Ventoy with Virtual Machine. Directly use the LiveCD ISO and install Ventoy to the disk inside the VM.
- 3. LiveCD Composition
Ventoy LiveCD is TinyCore Linux + Ventoy Linux install package. (Update: use Porteus Kiosk since 1.0.54)
If you already have an USB drive with Ventoy in it and you just want to update it or you want to install Ventoy to another USB drive, you just need to
put the LiveCD iso to the Ventoy USB drive and boot it as a normal ISO image by Ventoy.
If you don't have a normal Ventoy USB drive or it's your first time to install Ventoy, please refer any of the methods bellow.
After entering the Ventoy LiveCD OS, just follow the prompts at the end of this article to select the disk and install or update Ventoy.
Be careful not to select the wrong disk, so as not to format the system disk.
- 4. Method 1
- 4.1 Download Rufus
- 4.2 Write VentoyLiveCD ISO to the USB stick
- 4.3 Reboot your computer, and select USB boot option
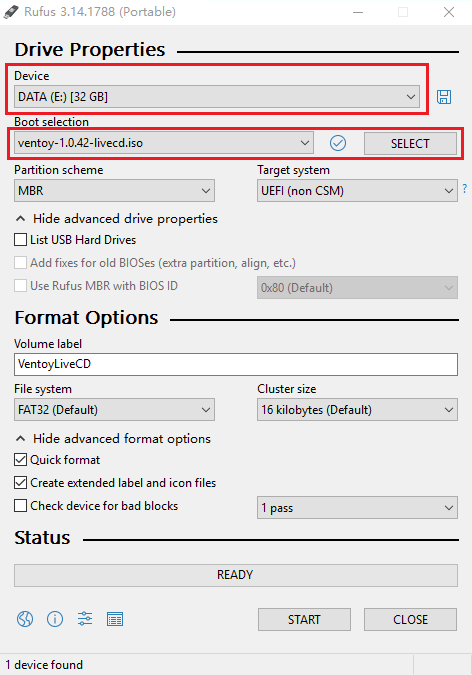
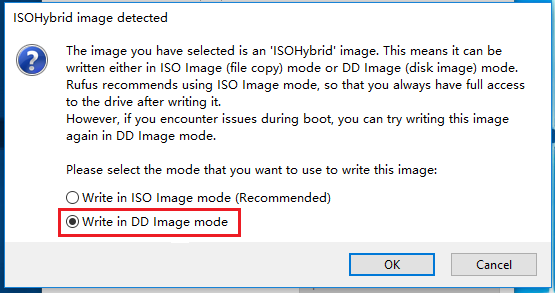
Rufus is an open source tool with only 1.1MB size. Download link: https://rufus.ie
Write the ISO file to the USB stick with rufus. Just select the right device and ISO file and keep other options unchanged.
Select dd mode in the prompt menu.
Restart your computer (better to cold restart), and boot the USB device. Finally enter the LiveCD OS and then follow the prompts at the end of this article.
- 5. Method 2
- 5.1 Format the USB drive with FAT32
- 5.2 Extract the files in the LiveCD to the USB drive
- 5.3 Reboot your computer, and select USB boot option in UEFI mode
Format your USB drive in FAT32 type by system command or third-part tools.
For USB drive with large capacity, maybe there is no FAT32 option when you format it in Windows.
You can create a small partition by diskpart (e.g. 4GB) and format the small partition with FAT32 filesystem.
Ventoy LiveCD,for example ventoy-1.0.20-livecd.iso has only an EFI directory in it. Get the EFI directory and copy it to the root of the FAT32 partition above.
Restart your computer (better to cold restart), change the BIOS mode to UEFI and boot the USB drive. Finally enter the LiveCD OS and then follow the prompts at the end of this article.
- 6. Method 3
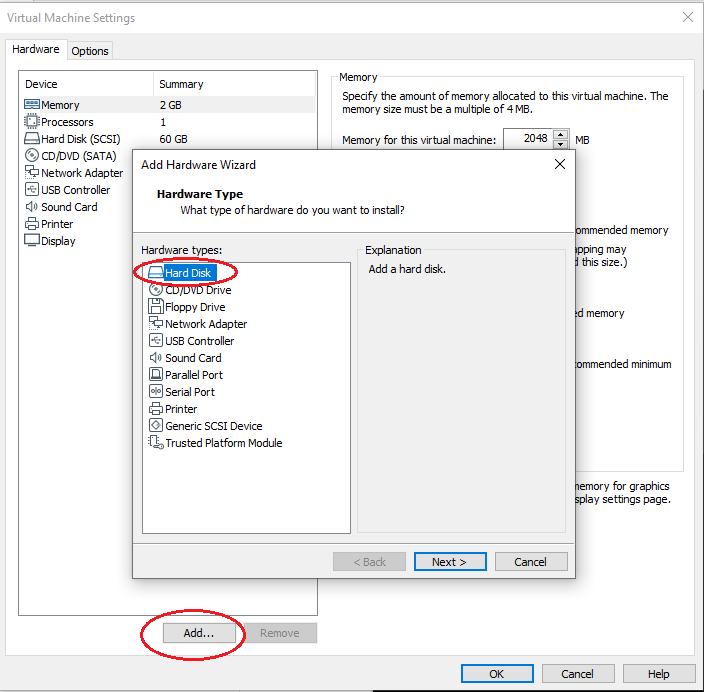
VMware is needed for this method.
- 6.1 Create a new VM
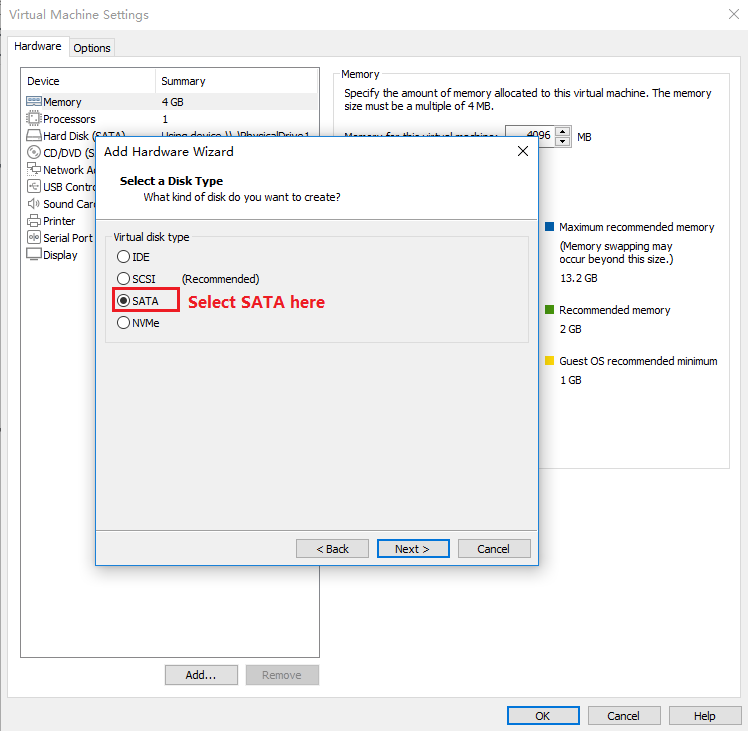
- 6.2 Delete the default disk, and add the USB drive as a disk to the VM
- Compare the list when you plug-in and plug-out the USB stick and check the difference. You must close and reopen the VMware program when plug-in and plug-out the USB stick or the disk list will not be refreshed.
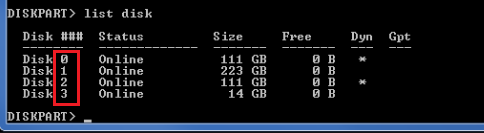
- Use list disk command of diskpart. As follows, the number in the red frame is corresponded to PhysicalDrive0/1/2...
- 6.3 Use the LiveCD ISO and boot the VM
Create a new VM with all default configurations.
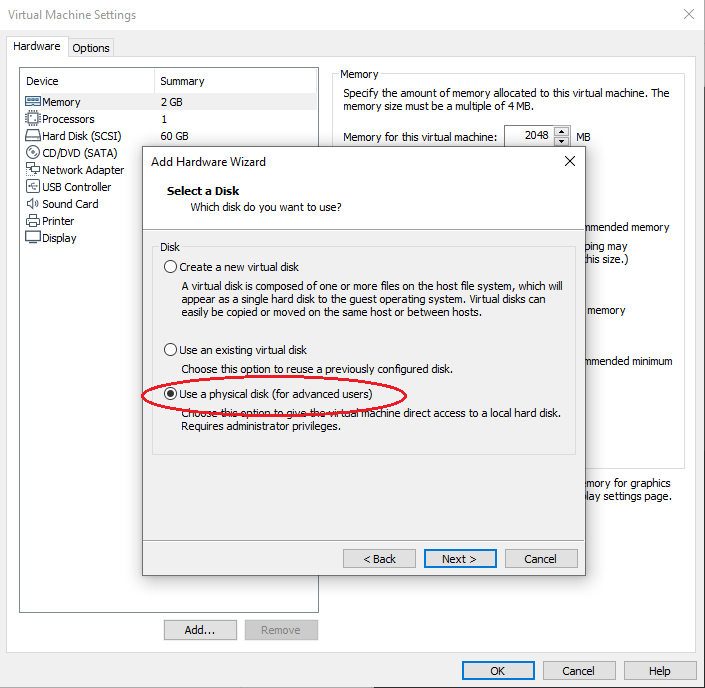
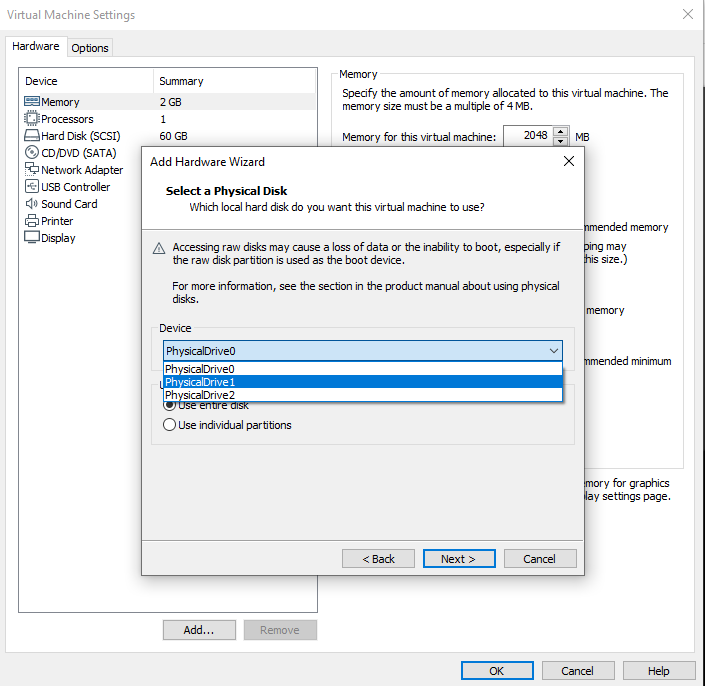
Note that when selecting the last step, make sure that the USB drive corresponds to PhysicalDrive0 or PhysicalDrive1 or other. This is very important. There are two ways for you to use to confirm:
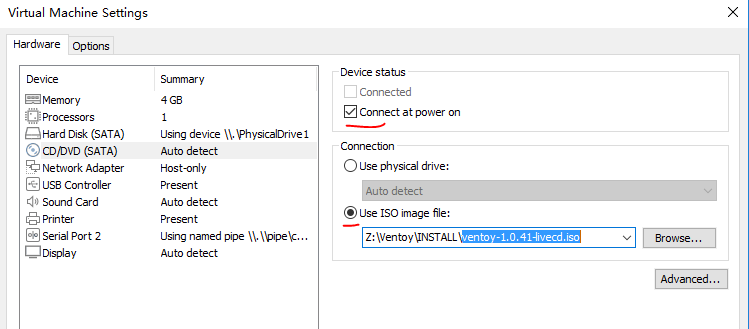
Use Ventoy LiveCD iso file in CD/DVD and boot the VM to enter the LiveCD system.
- 7. Ventoy LiveCD System Instructions (GUI mode since 1.0.54)
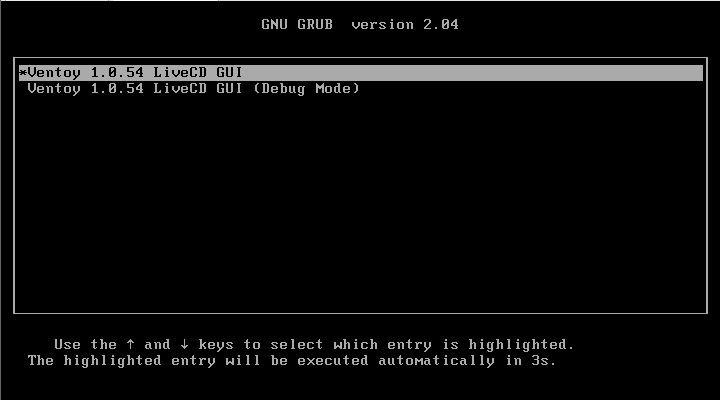
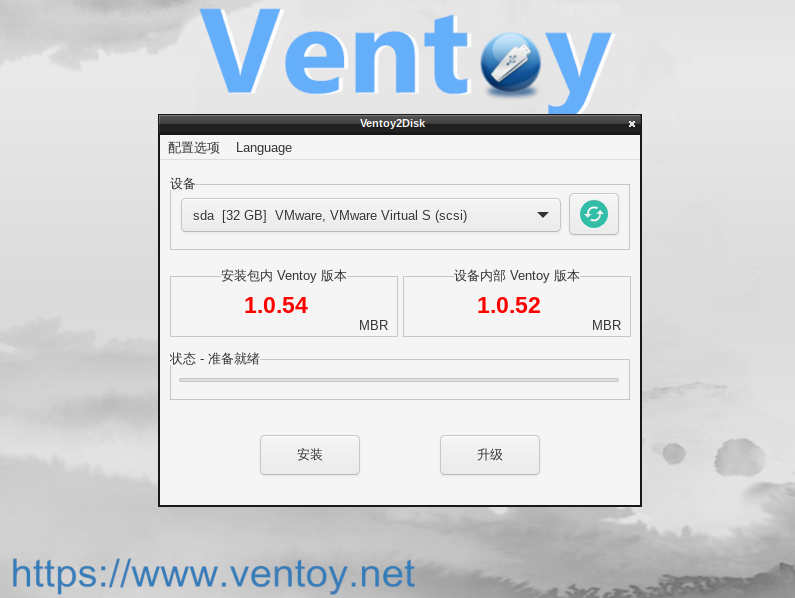
Attention:
1. Becareful when you choose the disk, don't select your system disk by mistake.
2. If you can't use mouse in the system, you can use F10 to select options, arrow keys to move the focus, and press Enter to install/update.
3. After install/update operation. Close the window then the system will auto reboot.
4. You can also use Ctrl+Alt+F2 to enter shell, and run Ventoy2Disk.sh manually as follows:
cd /ventoy
sh Ventoy2Disk.sh -i -g /dev/sdb